You can add permission checks to any kind of backend and frontend application with just a few lines of code using the Space Blocks Permissions SDK. In this blog post, we will add permission checks to an ASP.NET backend written in C#.
👉 For this example, you can find the entire Source Code on GitHub .
Create a simple demo app
To demonstrate, that there is no second floor or magic behind the scenes, we will start with a fresh new ASP.NET Web API project. With the following command, we can quickly create a new project.
dotnet new webapi -n SimplePermissions --use-controllers
The default template creates a single HTTP endpoint at the
/WeatherForecast
route, which generates a random weather forecast each time it gets fetched. Let’s quickly adjust the
code, so that a city and a fictional user can be passed to the endpoint.
Hint: In a real-world application, the User ID would not be passed via query parameters but would come out of an JWT for example. For this demo scenario, we oversimplified simulating different users, by passing their IDs directly.
For this, we adjust the
Get
method in the
WeatherForecastController.cs
by adding a few parameters and changing it to the
ActionResult
return type.
[HttpGet(Name = "GetWeatherForecast")]
public async Task<ActionResult<IEnumerable<WeatherForecast>?>> Get([FromQuery] string city, [FromQuery] string user)
{
    var forecast = Enumerable.Range(1, 5).Select(index => new WeatherForecast
    {
        Date = DateOnly.FromDateTime(DateTime.Now.AddDays(index)),
        TemperatureC = Random.Shared.Next(-20, 55),
        Summary = Summaries[Random.Shared.Next(Summaries.Length)],
        City = city
    })
    .ToArray();

    return Ok(forecast);
}
Define Permissions
Space Blocks Permissions supports very complex and hierarchical permission structures, but for our sample application, we will try to keep the permissions structure as simple as possible. We start by creating a new project in the Space Blocks Developer Portal . Then we navigate to Permissions in the sidebar and create a configuration.
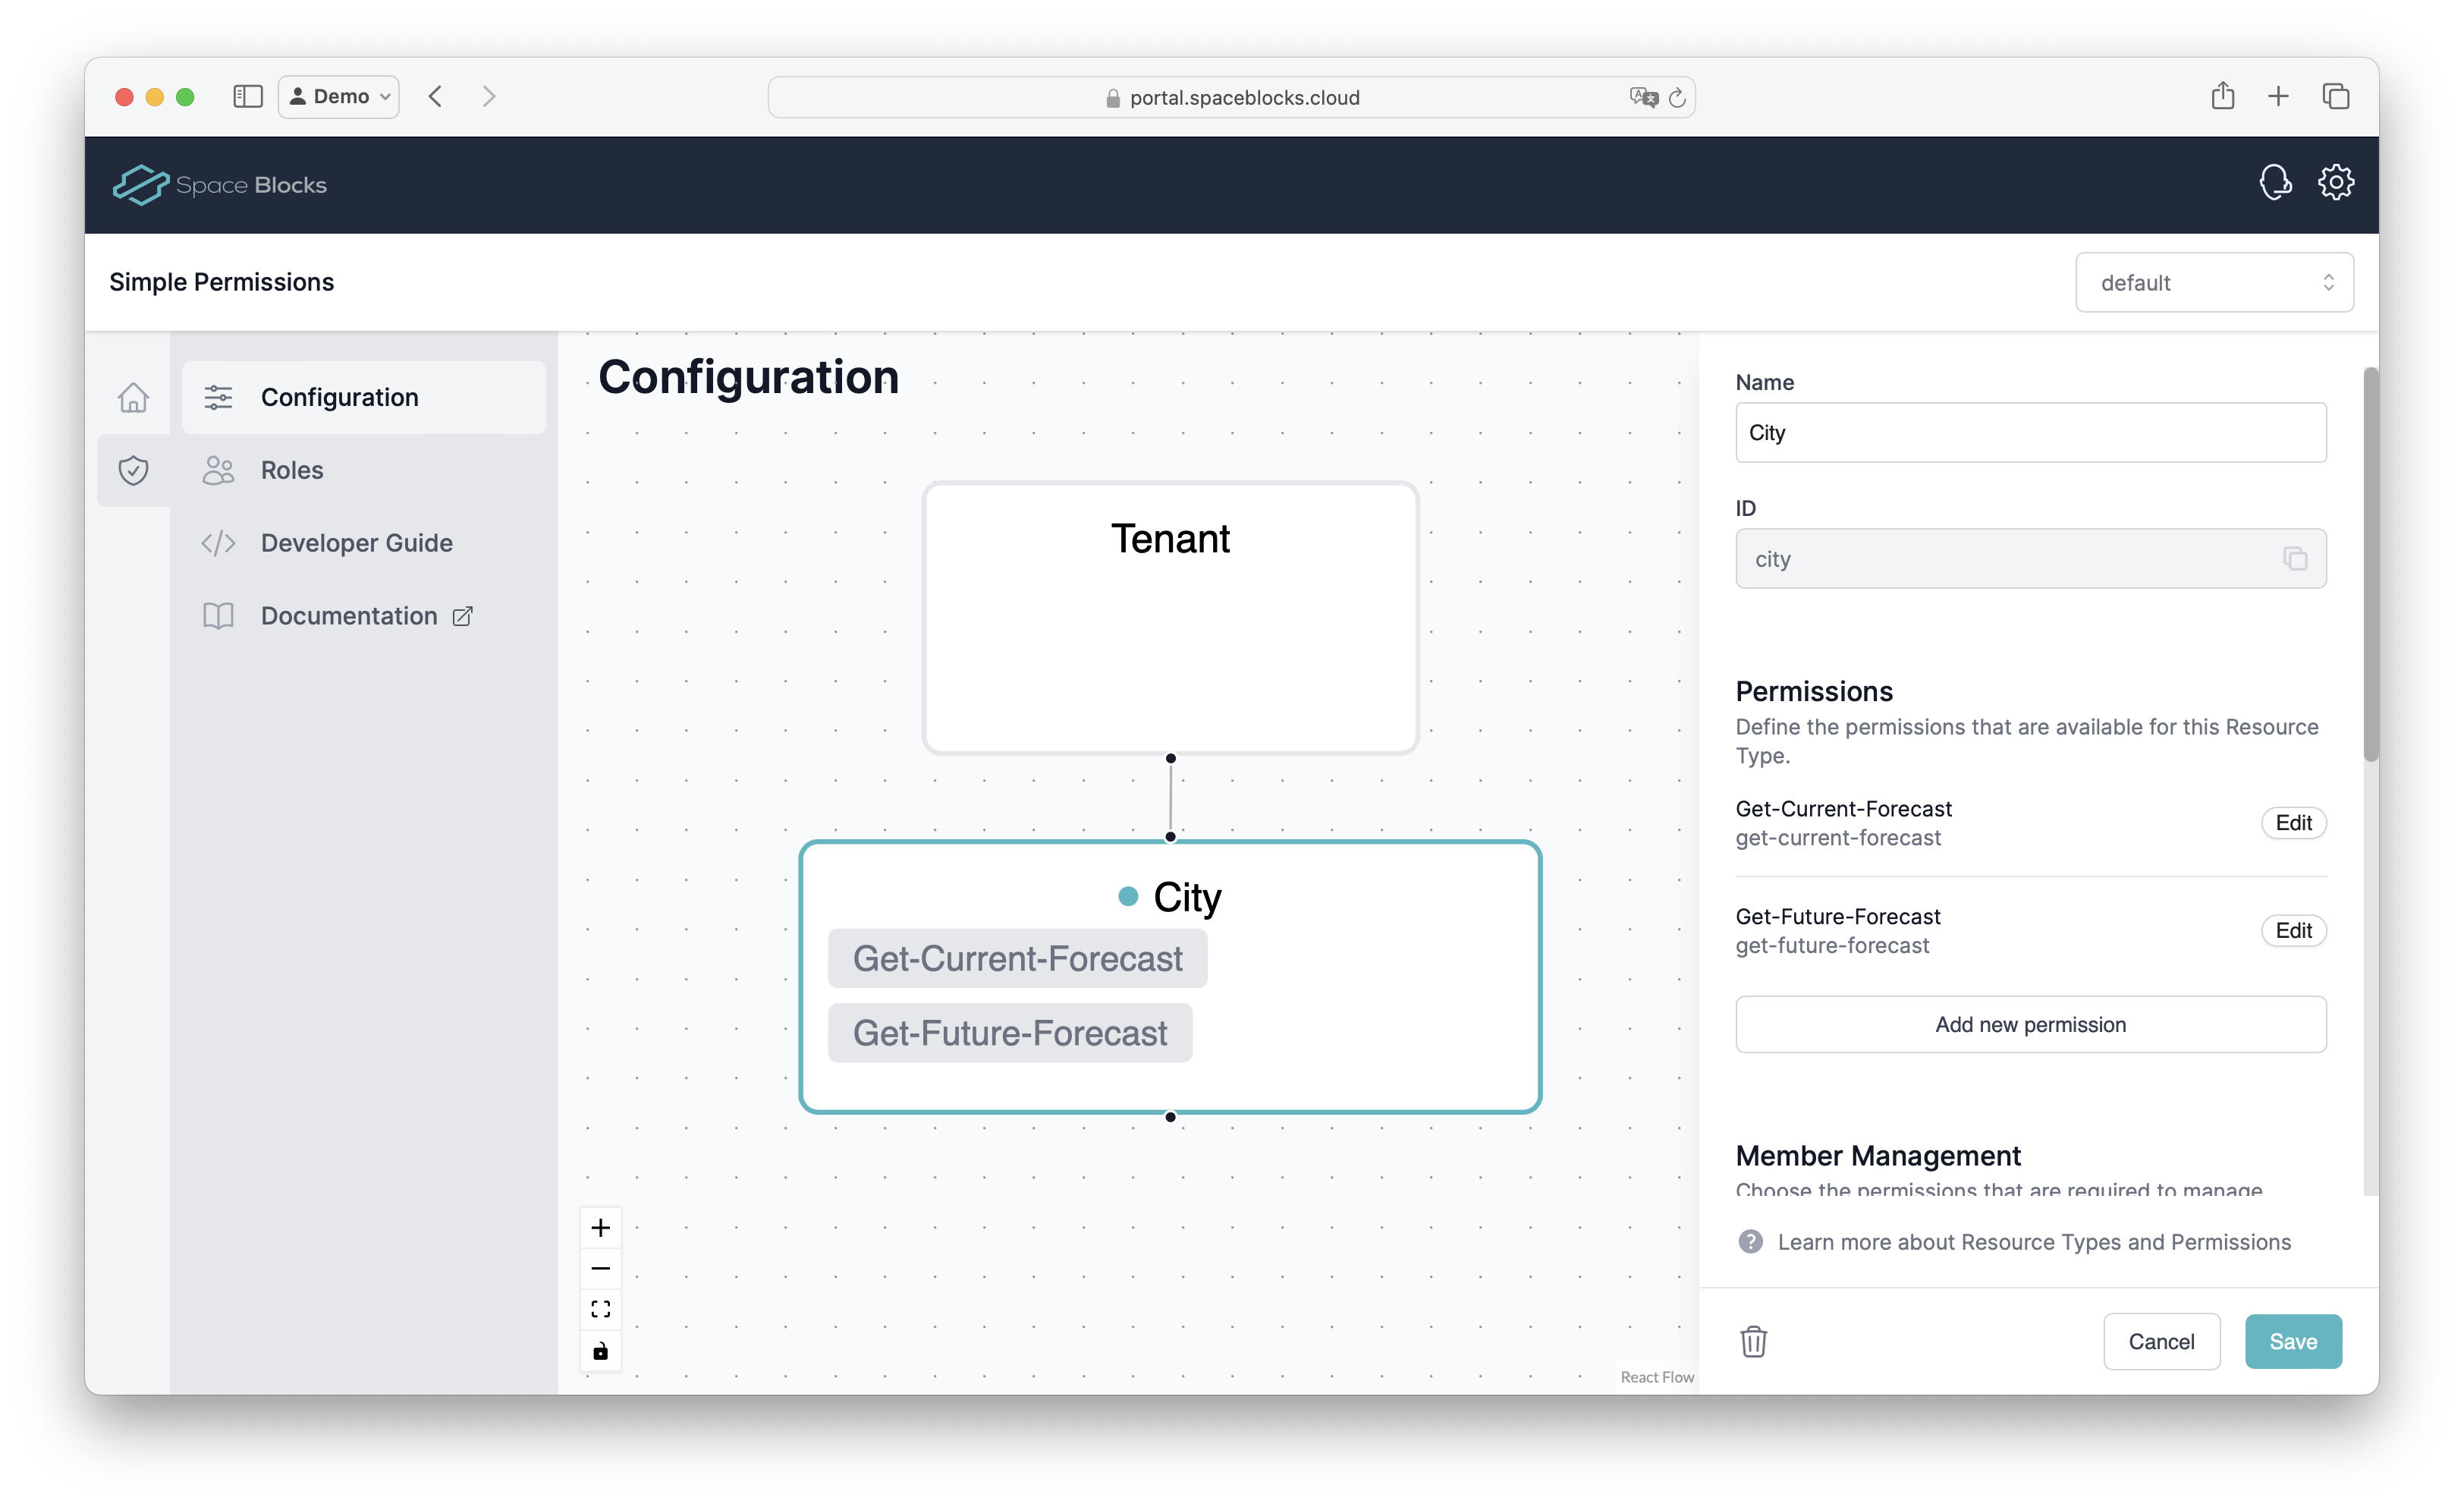
Our sample use-case consists of just one single type of resources: Cities. To define this Resource Type, we can drag a line from Tenant to a free space on the canvas and call our new Resource Type City. After saving, we can add Permissions to the Resource Type. Let’s start with just two permissions, one to see the current weather forecast called Get-Current-Forecast and one to see a city’s future forecast called Get-Future-Forecast .
Define Roles
Space Blocks Permissions are based on roles. This means, that a user never gets a permission assigned directly, but always as a role. So instead of having the Get-Future-Forecast permission on a city, as user rather has the Current Forecast Viewer or Future Forecast Viewer role assigned.
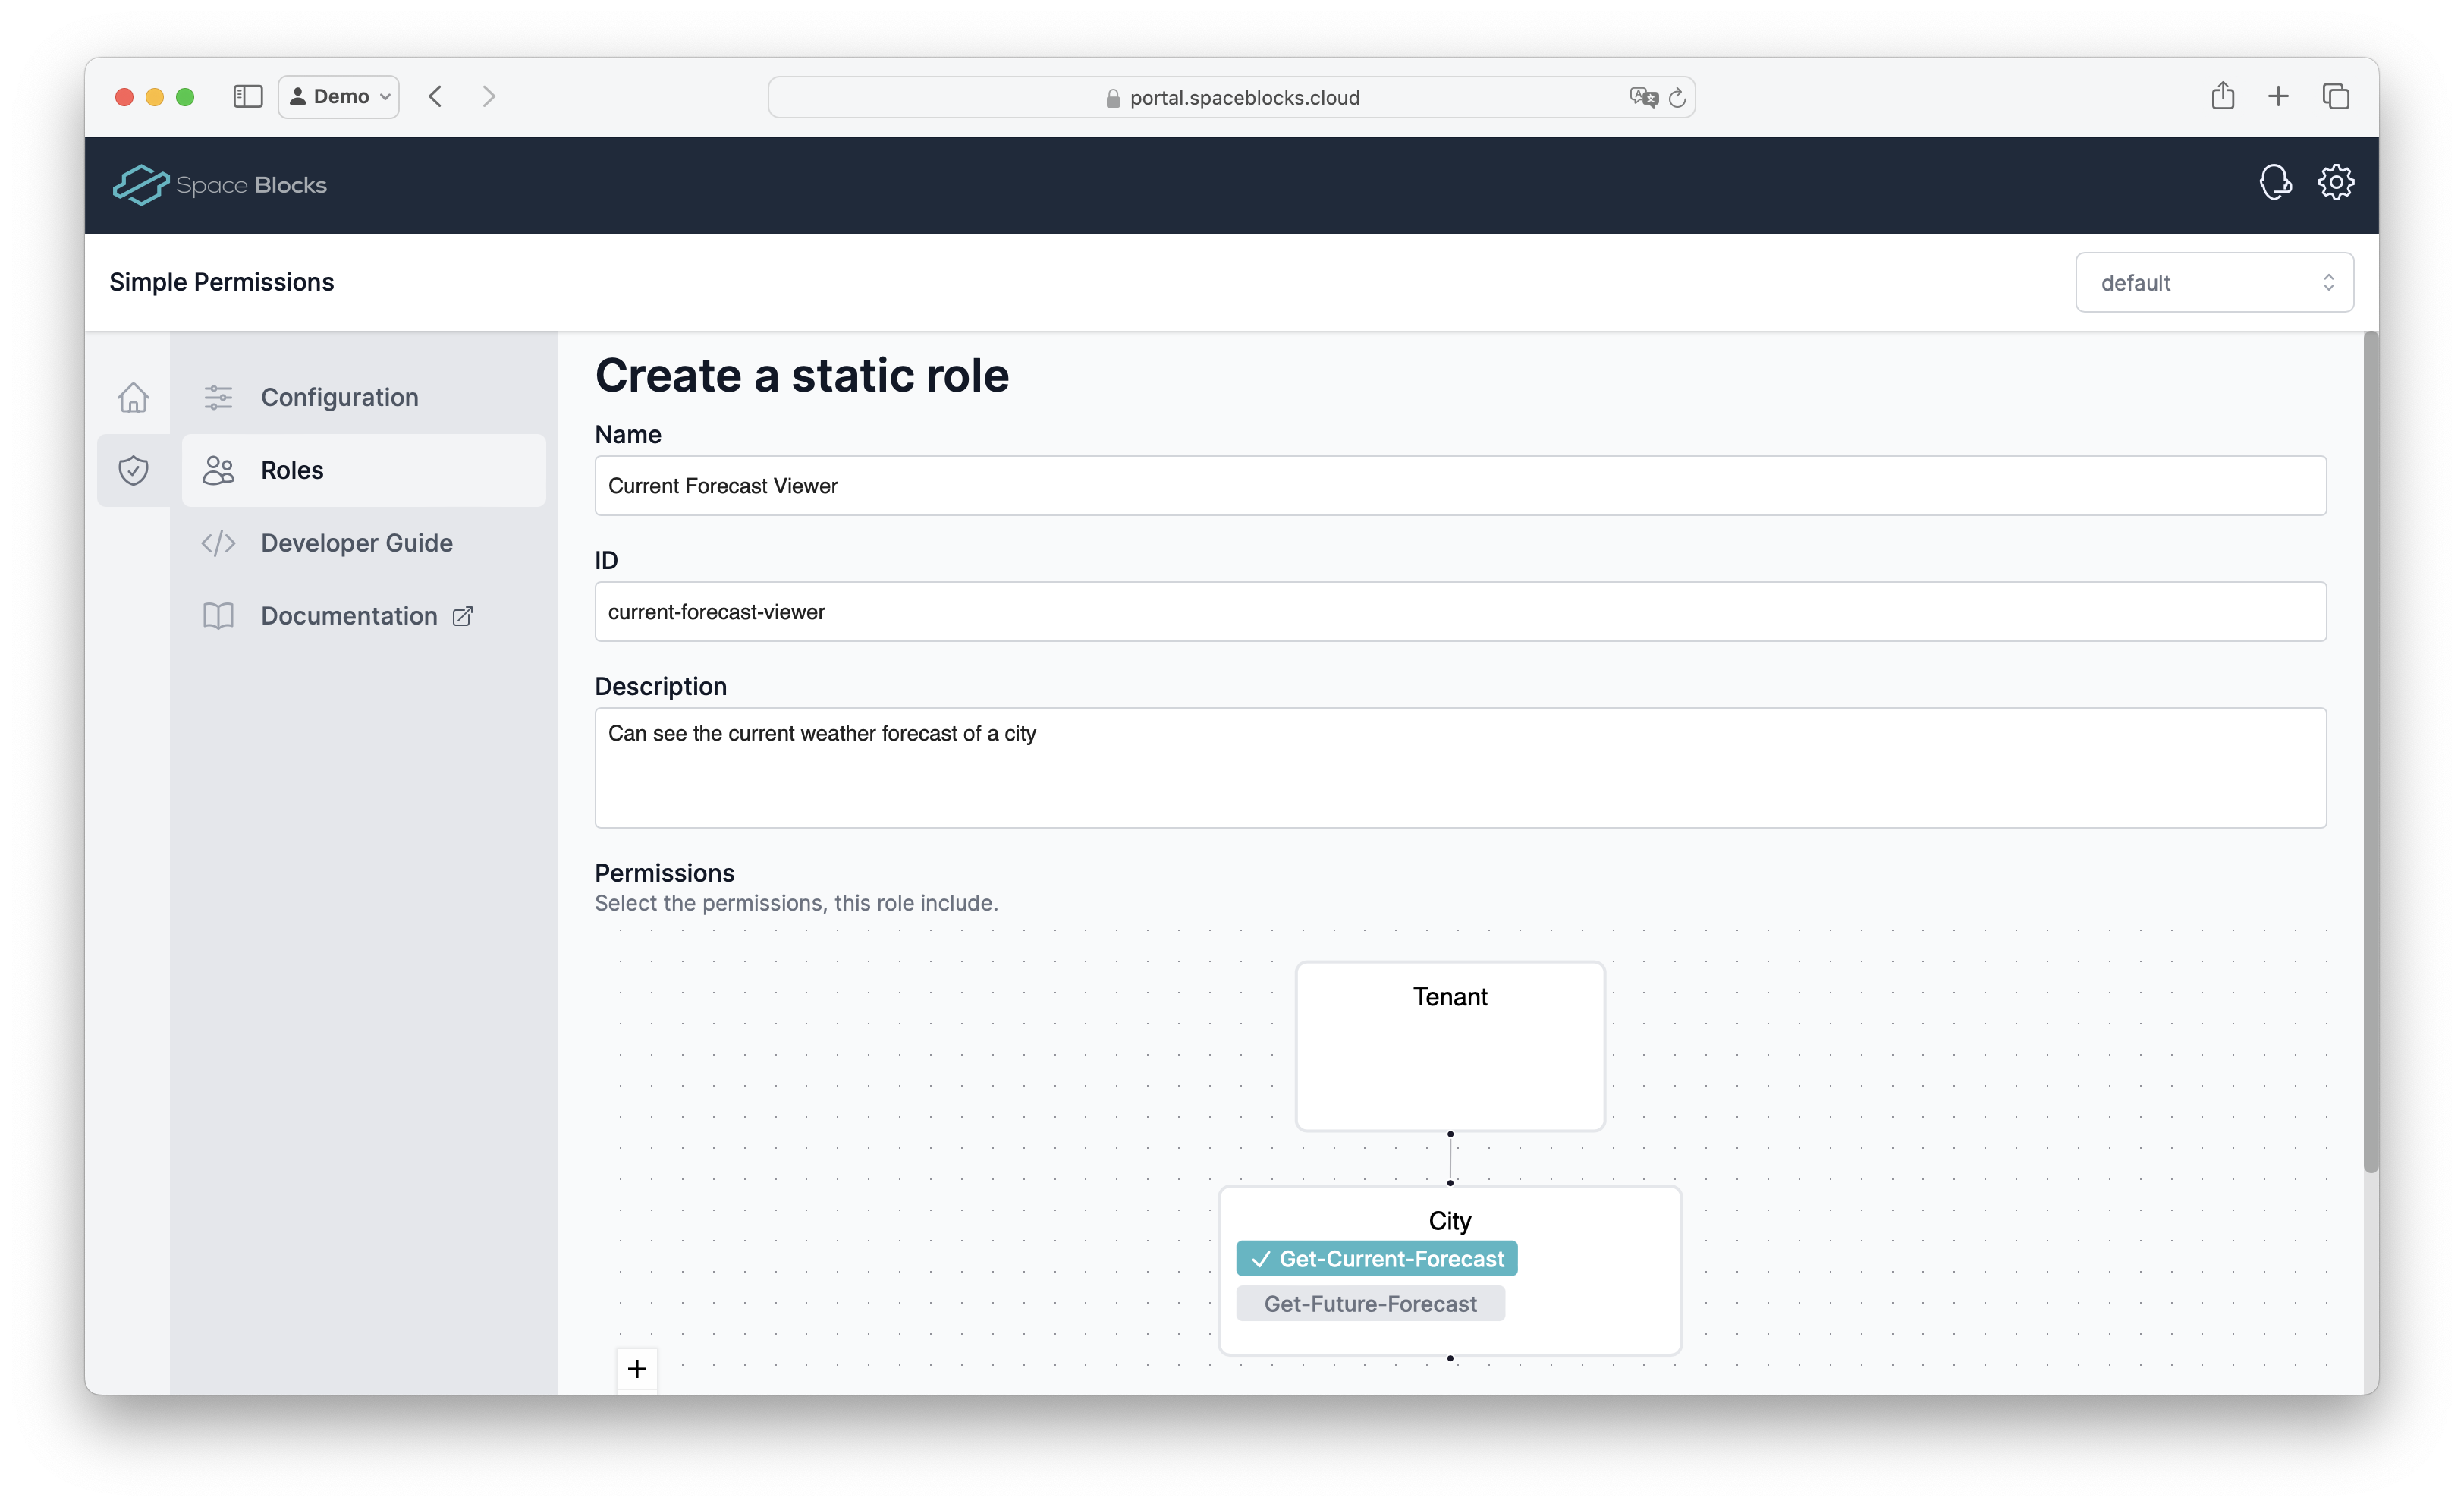
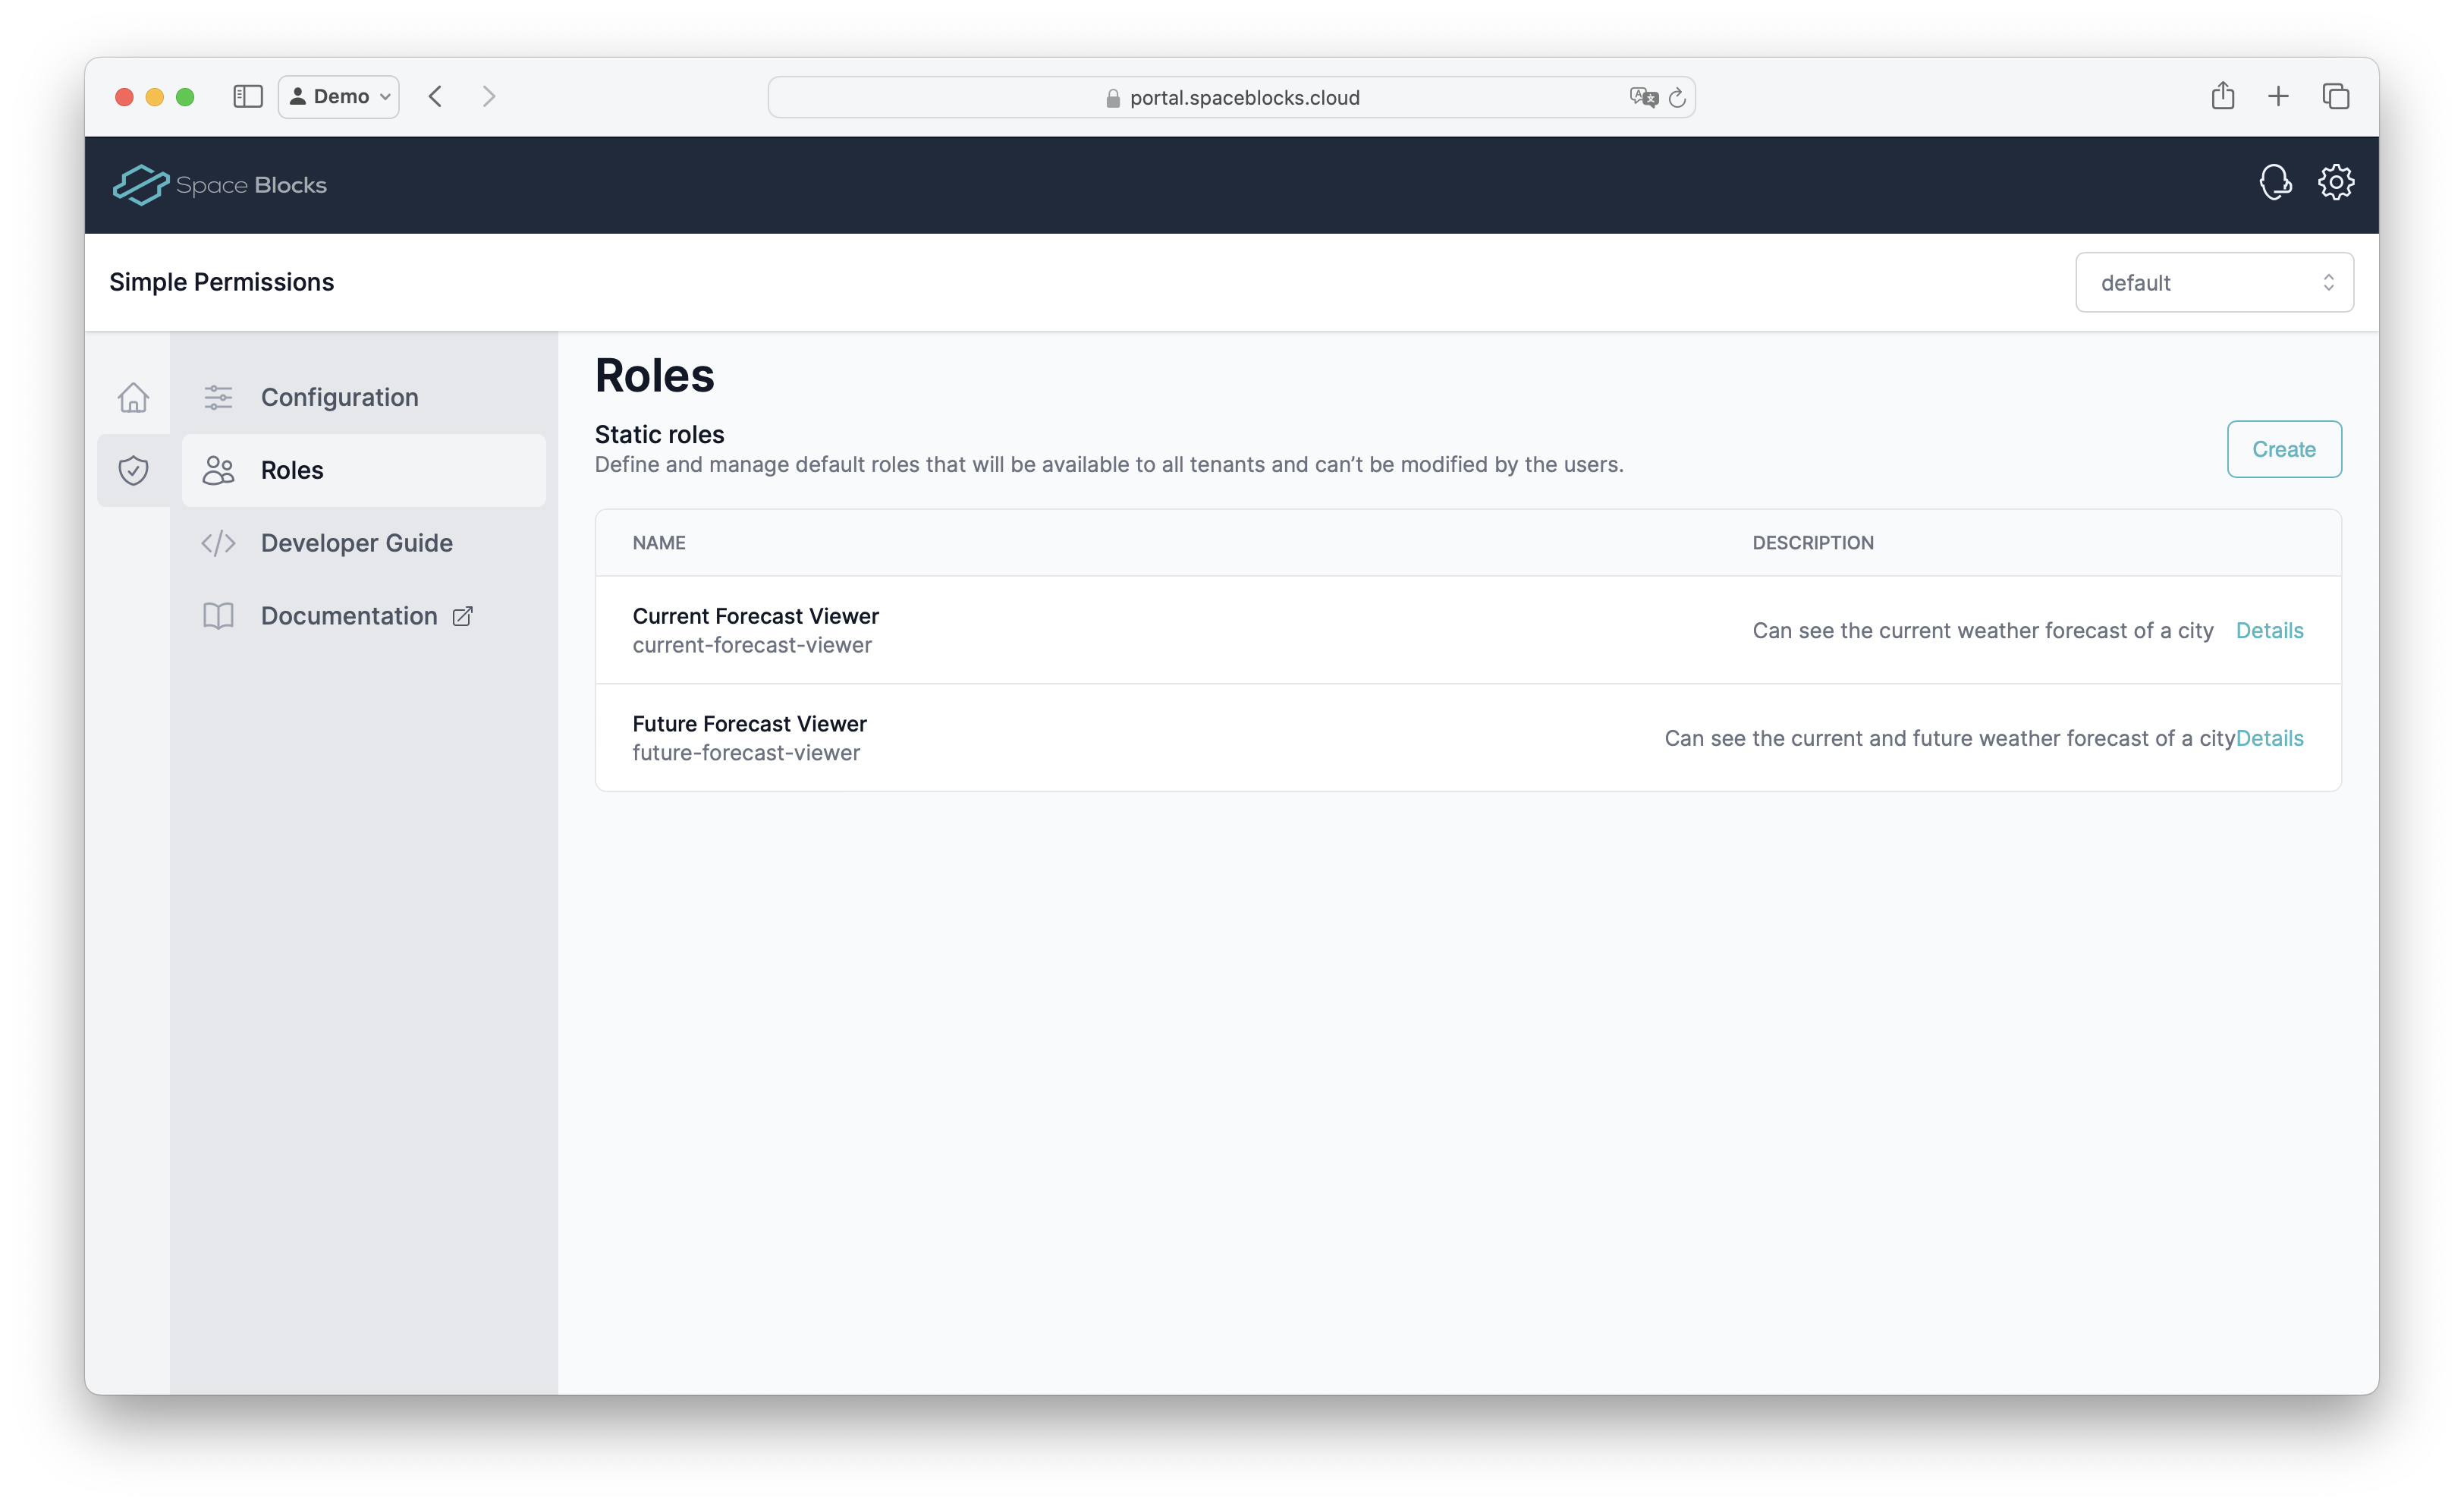
Before we can assign these roles, we need to create them in the Developer Portal by clicking on Roles in the sidebar. Here we can define a role called Current Forecast Viewer , for which we only select the Get-Future-Forecast permission in the UI. Afterward, we also add a role called Future Forecast Viewer , for which we select all permissions.
Creating a client
Before we can communicate with the Space Blocks Permissions API, we need to create an OAuth Client for it. Click the Create button in the client section of your Project Overview , give the client a name and select the following configuration:
- Environment: default
- Audiences: Permissions
-
Scopes:
permissions:management:read,permissions:management:write
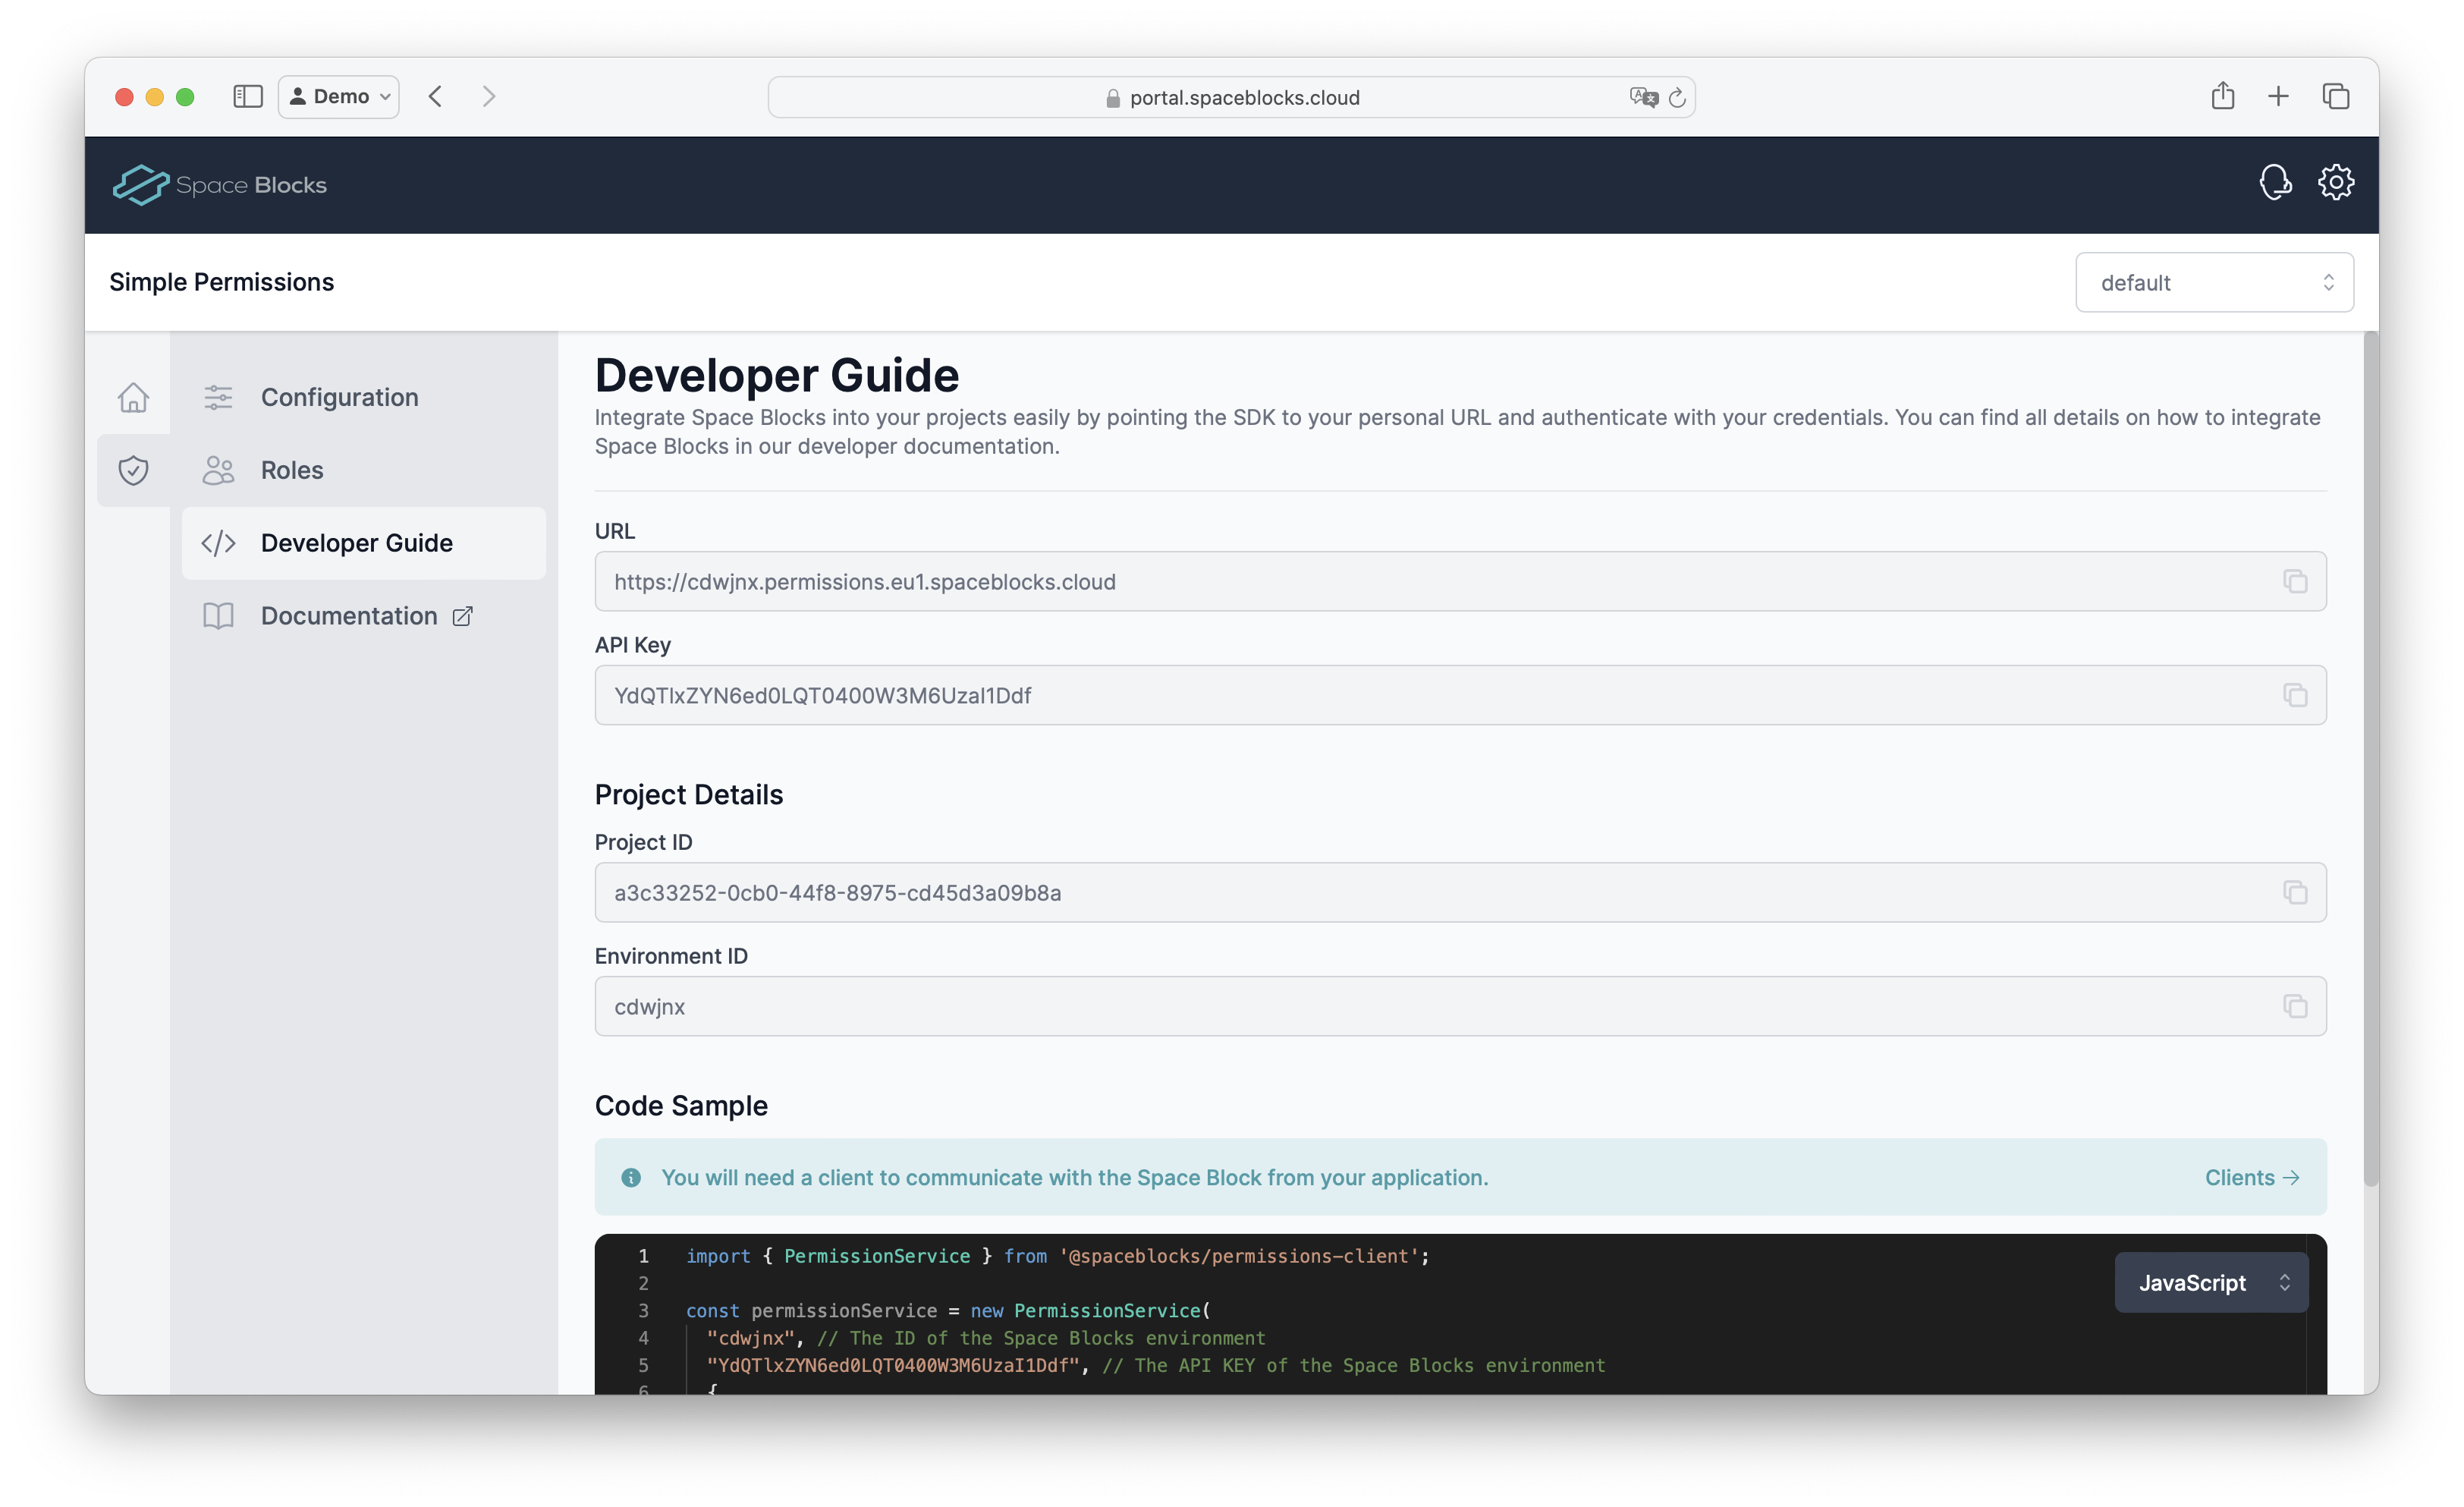
Additionally to the client, you will also need some basic information like API Key and URL to communicate with the Space Blocks API. You can find this information in the Developer Guide section of your project.
Seeding the scenario
Now we can theoretically start communicating with the Space Blocks API for Permissions checks. But at the moment, this would not be much fun, as there are no cities or role assignments registered. To have some demo data to play around with, we have created a seeding script , that you can use to bring some live into our demo. It creates
- One Tenant called Default
- Two cities Cansas and Seattle
- Role assignment of the Future Forecast Viewer for Linda on the city of Cansas
- Role assignment of the Future Forecast Viewer for Linda on the city of Seattle
- Role assignment of the Current Forecast Viewer for Alice on the city of Seattle
This will result in Linda being allowed to see the current and future forecast for both cities, Cansas and Seattle and Alice being allowed to only see the current forecast and only of Seattle.
Hint: In a real-world application, the seeding would not be done via scripting but would also be part of your application logic. Whenever a new city gets created or whenever a new role assignment is being made, you would call our API via the Space Blocks SDK.
Let’s run the seeding script , with the following commands.
bash <(curl -s https://raw.githubusercontent.com/wemogy/spaceblocks-sample-aspnet/main/seeding.sh)It will ask you for the Permissions URL and API Key, which you can find in the Developer Guide section of your project, and the Client ID and Client Secret from the Client you created earlier.
Add Permission Checks
Now, it’s finally time to get back to our
ASP.NET
backend code, to add the permission check logic to our code. As a first step, we get started by adding
the
SpaceBlocks.Permissions.Server NuGet package
to get the SDK into our project.
dotnet add package SpaceBlocks.Permissions.Server
Now, we need to initialize the
PermissionsClient
from the SDK. This can be done in the constructor of the
WeatherForecastController
. Don’t forget to replace the API Key, Client Credentials and Permissions URL placeholders with your own
values.
private readonly ILogger<WeatherForecastController> _logger;
private readonly PermissionsClient _client;

public WeatherForecastController(ILogger<WeatherForecastController> logger)
{
    _logger = logger;
    var auth = new AuthenticationOptions(
		"<API_KEY>",
        "<YOUR_CLIENT_ID>",
        "<YOUR_CLIENT_SECRET>",
        "permissions:management:read permissions:management:write");

    _client = new PermissionsClient(new Uri("<YOUR_PERMISSIONS_URL>"), "<API_KEY>", auth);
}
Lastly, we go back to the
Get
method from the beginning and add the code for the permission checks to it.
[HttpGet(Name = "GetWeatherForecast")]
public async Task<ActionResult<IEnumerable<WeatherForecast>?>> Get([FromQuery] string city, [FromQuery] string user)
{
    // Check, which permissions the user has for the city
    var permissions = await _client.PermissionApi.ListPermissionsAsync(
        tenantId: "default",
        resourceTypeId: "city",
        resourceId: city,
        subjectId: user);

    // Get permissions for the user
    var canGetCurrentForecast = permissions["city"].Contains("get-current-forecast");
    var canGetFutureForecast = permissions["city"].Contains("get-future-forecast");
    if (!canGetCurrentForecast && !canGetFutureForecast)
    {
        return Unauthorized("You don't have permissions to access this resource.");
    }

    // Depending on the permissions, return the forecast for 1 or 5 days
    var forecastDays = canGetFutureForecast ? 5 : 1;

    // Generate the forecast
    var forecast = Enumerable.Range(1, forecastDays).Select(index => new WeatherForecast
    {
        Date = DateOnly.FromDateTime(DateTime.Now.AddDays(index)),
        TemperatureC = Random.Shared.Next(-20, 55),
        Summary = Summaries[Random.Shared.Next(Summaries.Length)]
    })
    .ToArray();

    return Ok(forecast);
}
What we did here is first listing all permissions the given user has on the given city with the
ListPermissionsAsync
method from the SDK. Then we check, of the permissions at the
city
level contains the
get-current-forecast
or
get-future-forecast
Permission IDs and set the
canGetCurrentForecast
and
canGetFutureForecast
variables accordingly. If none of them are set, we return a 401 Unauthorized response. To define the
value of the
forecastDays
variable, we check if the current user has the
canGetFutureForecast
permission. If so, we show the forecast for the next 5 days, otherwise, we just show it for 1 day.
Let’s give it a try!
To try it out, we need to start the application by starting a Debug Session in Visual Studio Code or by
just running the command from below.
dotnet run
This should bring up the
Swagger page
for the Web API project on
http://localhost:5143/swagger
, with which we can try, if the permission checks worked as intended.
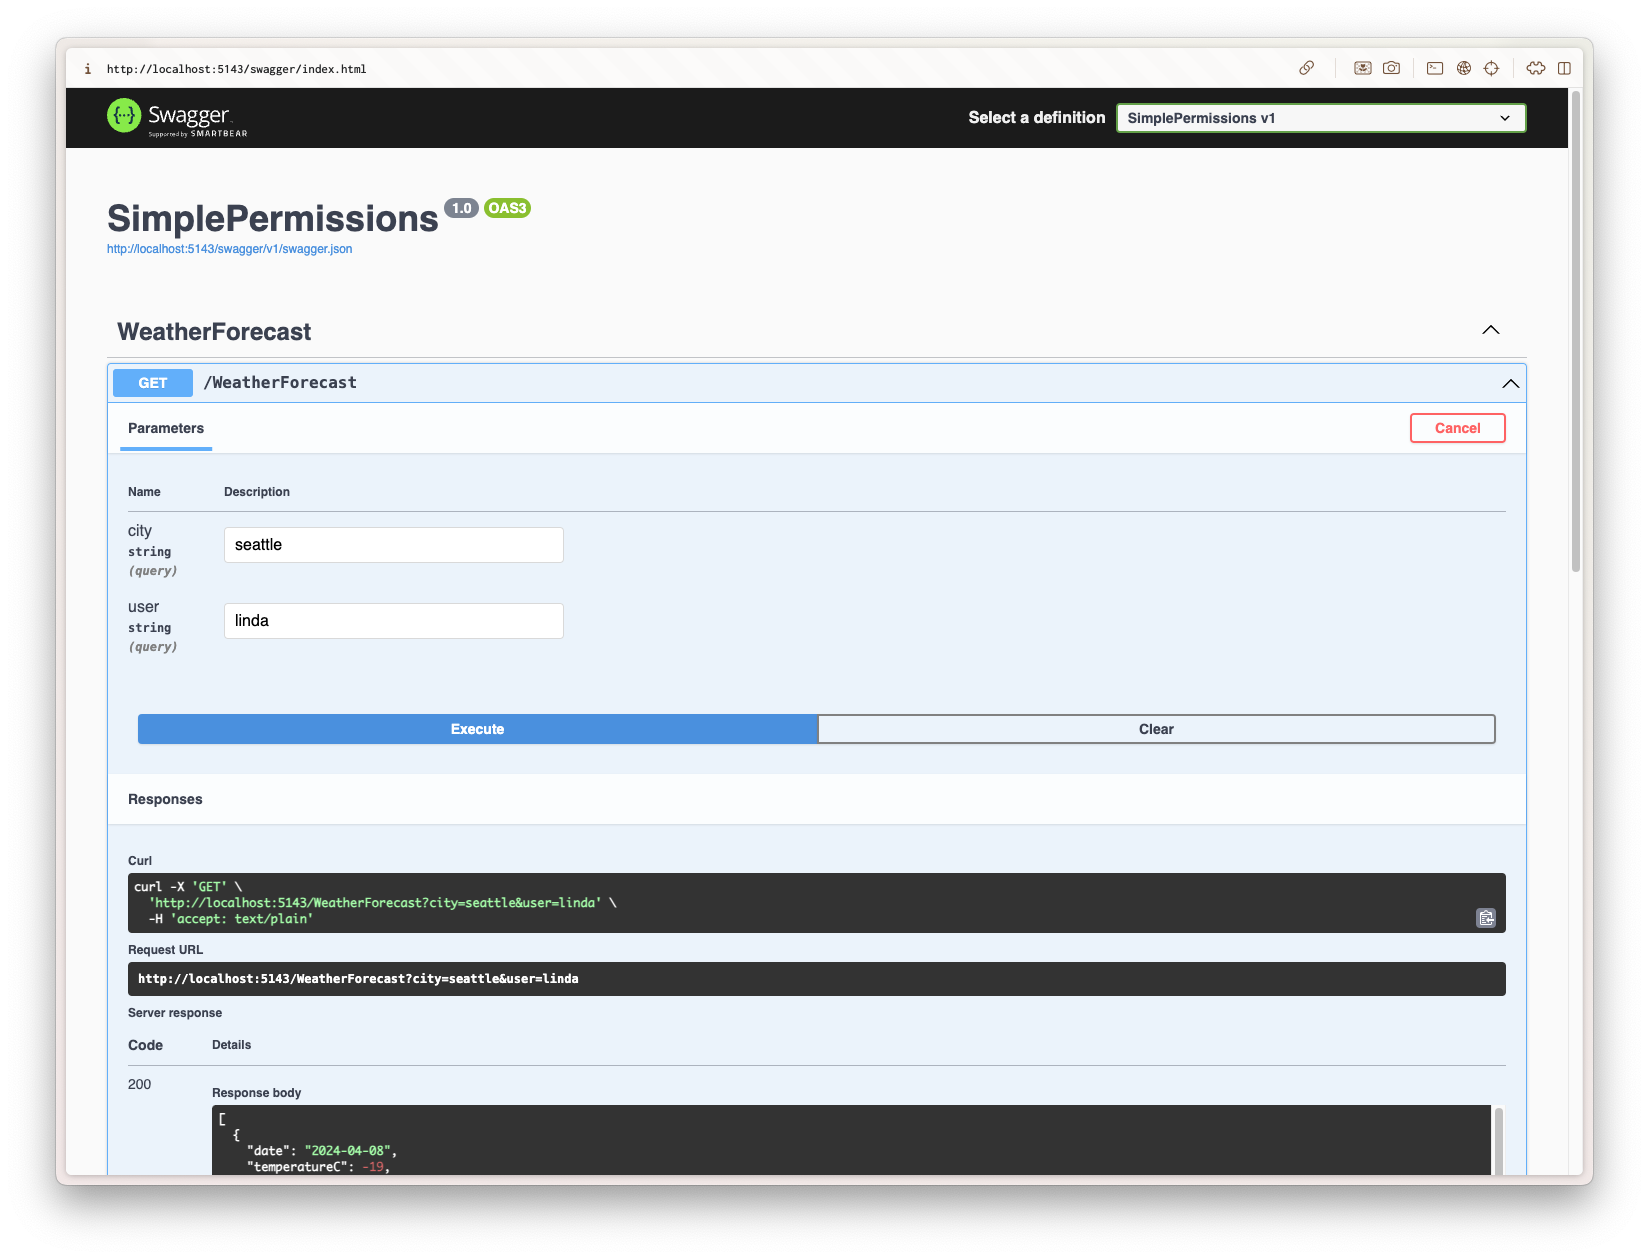
Remember, we are expecting the following results:
- User: Linda , City: Cansas → 5 day forecast
- User: Linda , City: Seattle → 5 day forecast
- User: Alice , City: Cansas → 401 Unauthorized
- User: Alice , City: Seattle → 1 day forecast
- User: Unknown , City: Unknown → 401 Unauthorized
👉 Remember, you can find the entire Source Code on GitHub .


